TRX S Frame Elevated Standard – TRX Multi-Mount – Specs Installation
TRX S Frame Elevated Standard Installation
TRX S Frame Is a heavy piece of equipment. It is intended to support significant weight during routine use and should be securely assembled and fastened to a supporting surface of suitable construction.
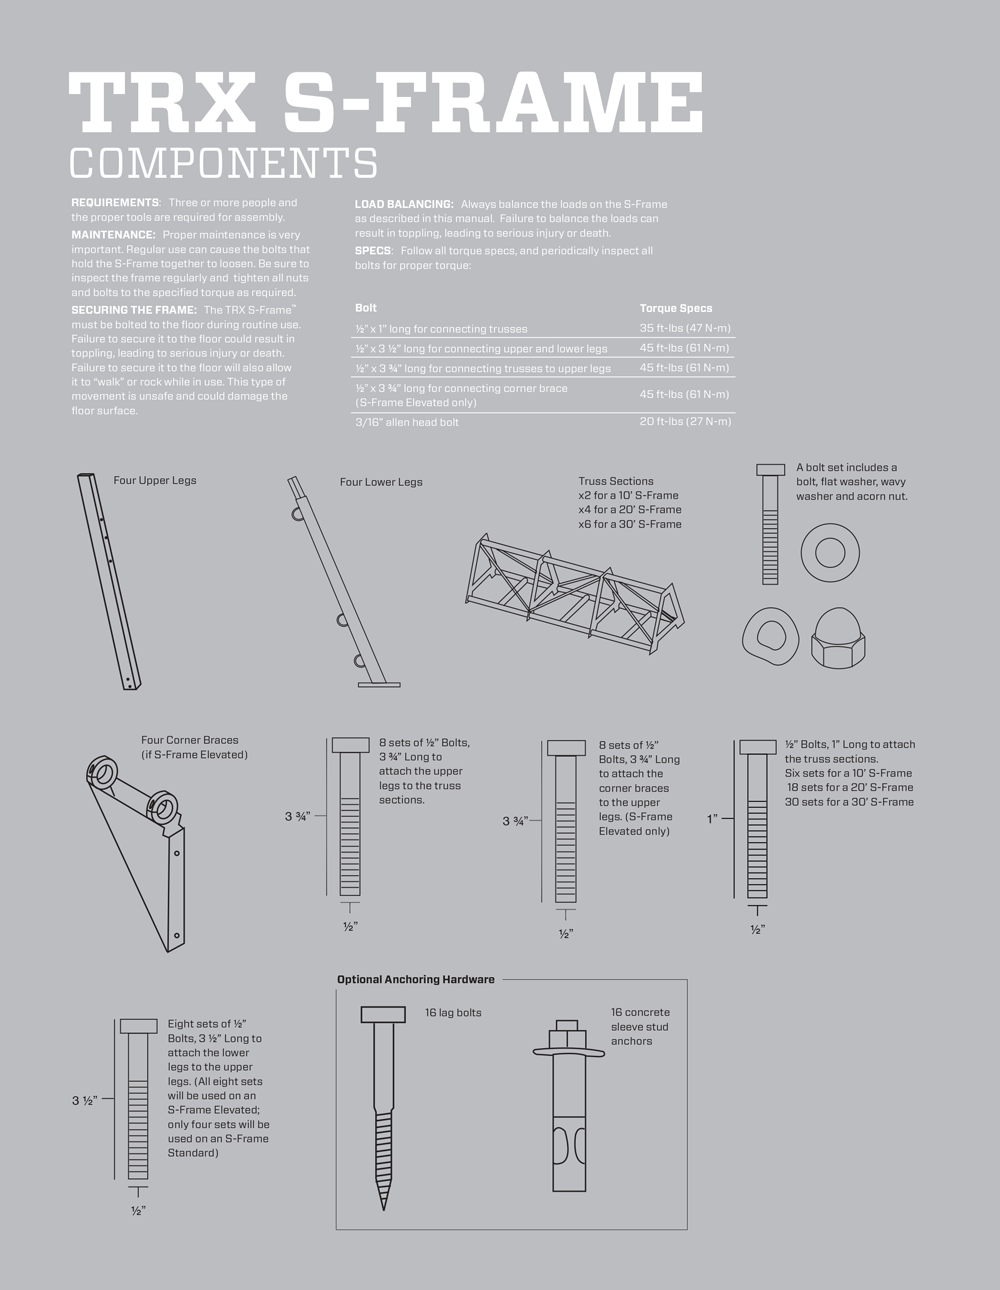
Components
Requirements: Three of more people and the proper tools are required for assembly.
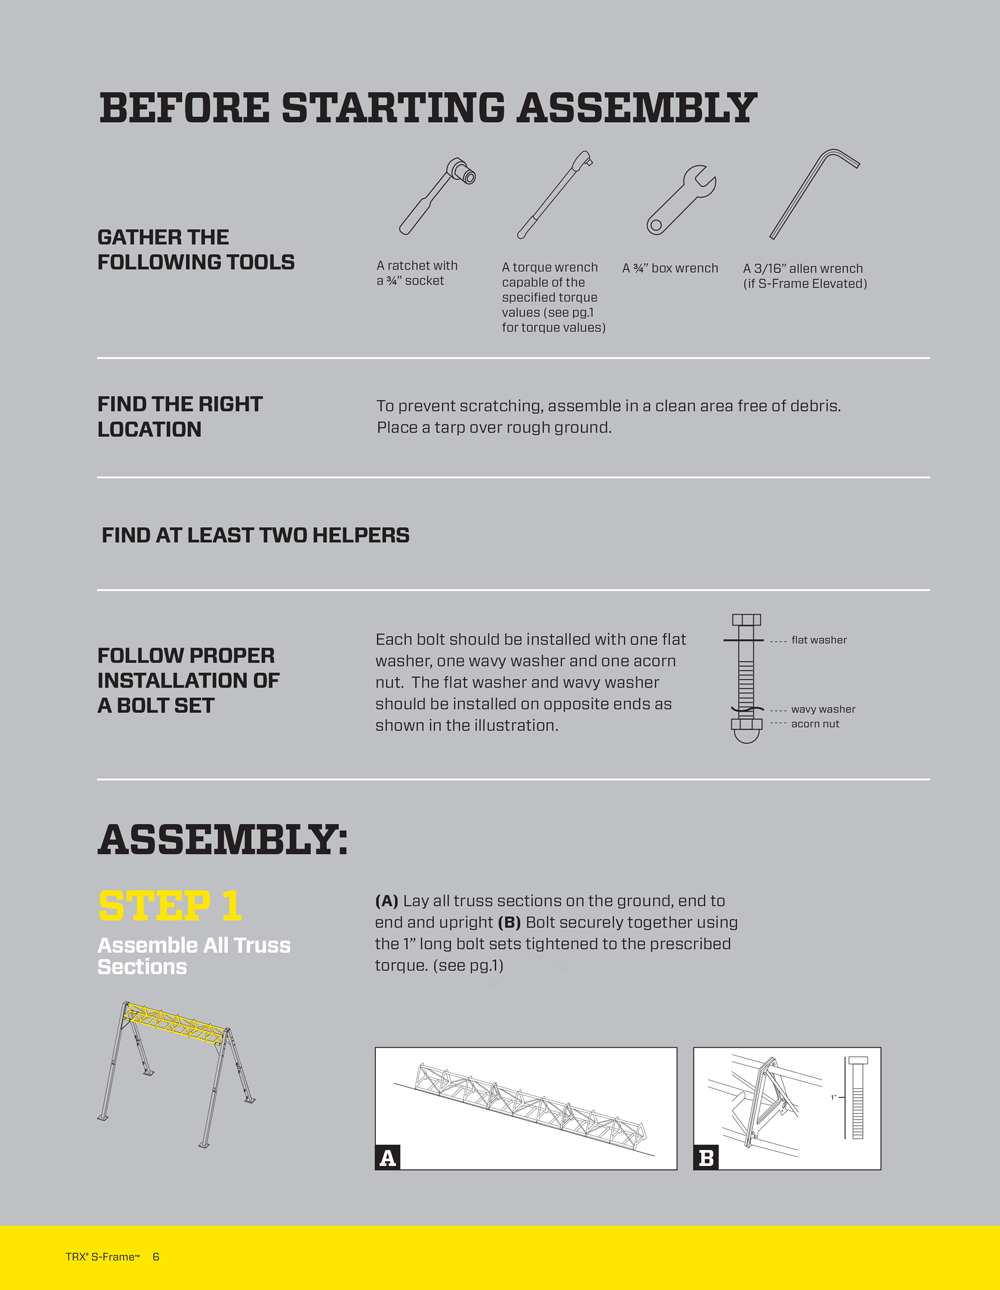
Starting Assembly:
Gather the following tools – Find the right location – Find Helpers – Follow proper installation of bolt sets.
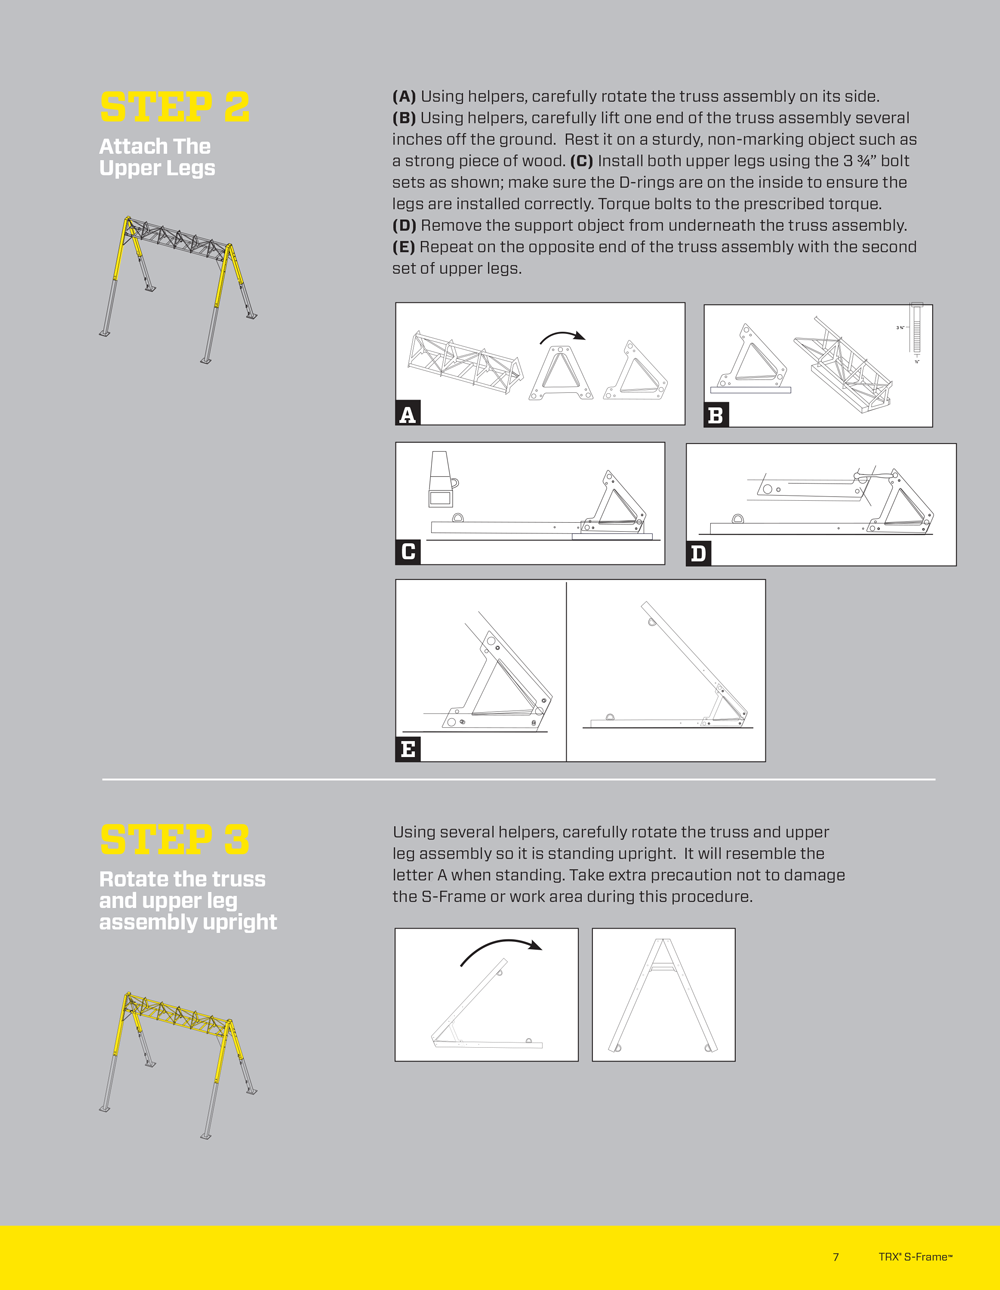
Step 1: Assemble oll truss sections:
Step 2: Attach the Upper Legs:
Step 3: Rotate the truss and upper legs assembly uproght:
Step 4: Install the sign:
Step 5: Add the corner braces (Elevated version Only)
Step 6: Add the lower legs:
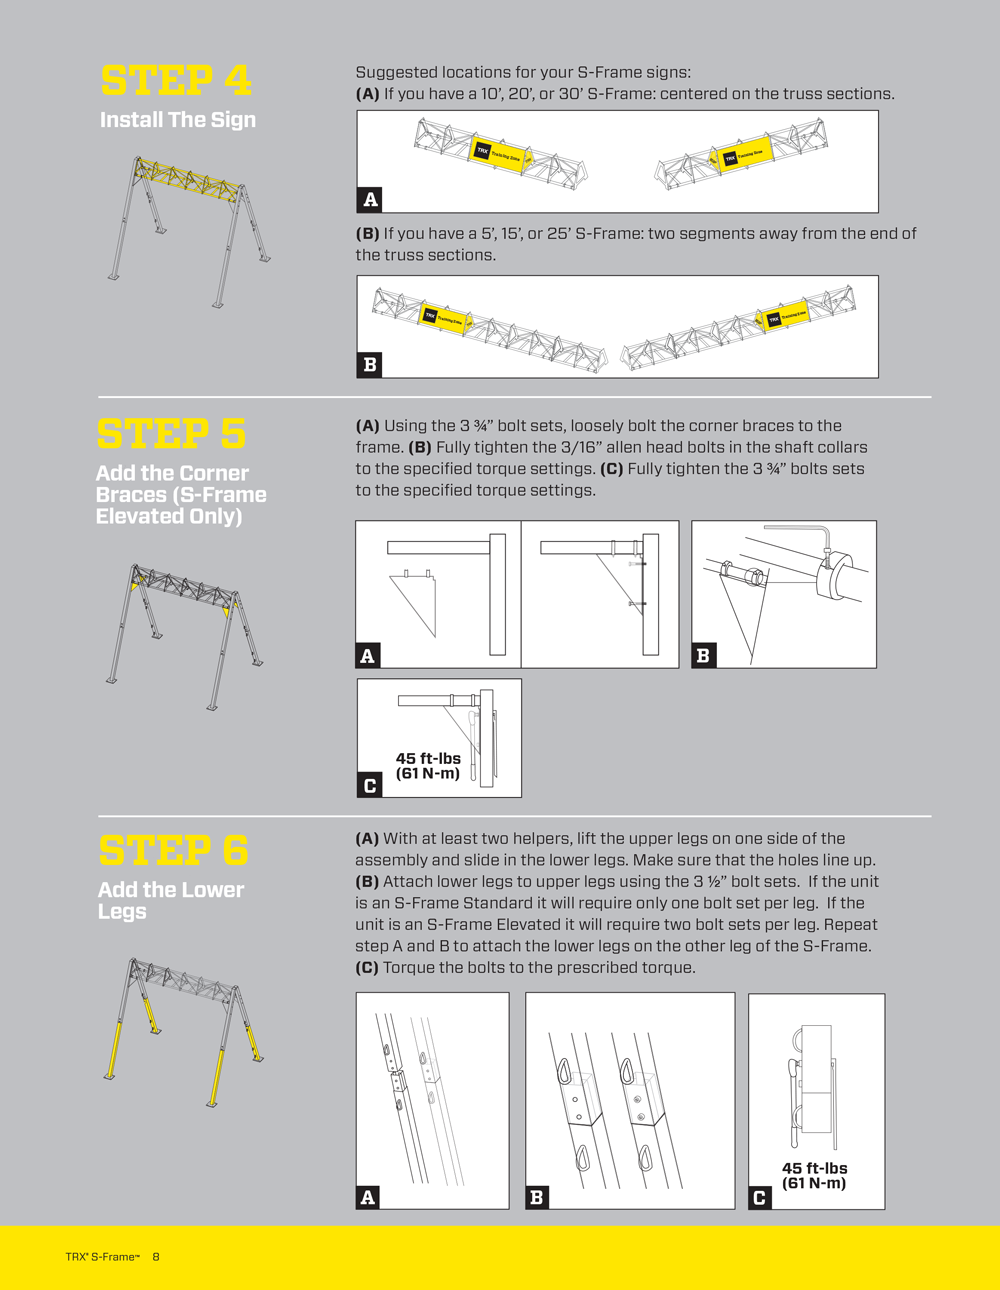
Step 7: Bolt the TRX S Frame to the ground:
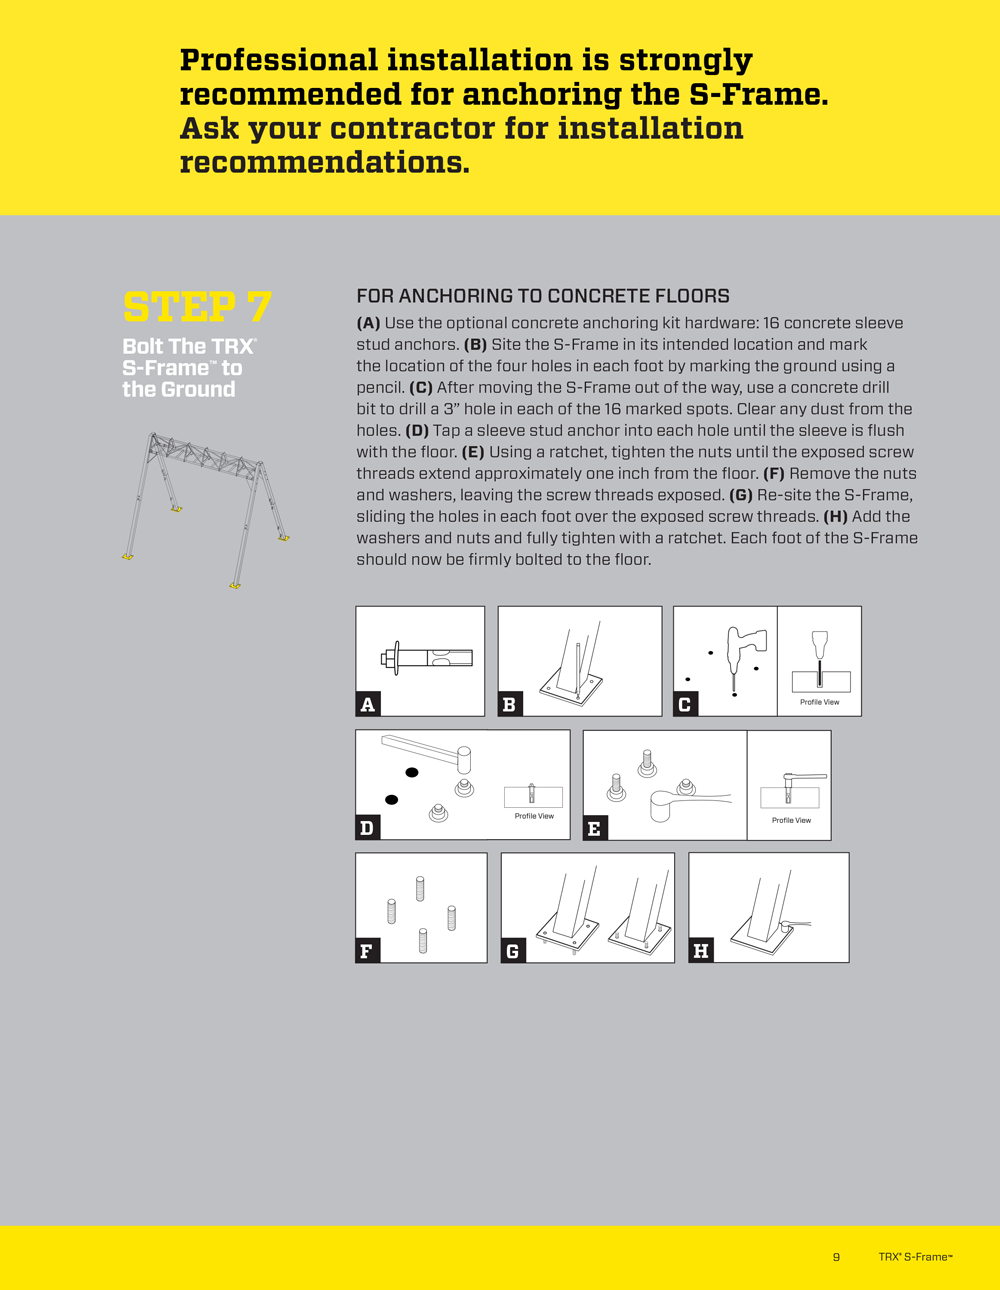
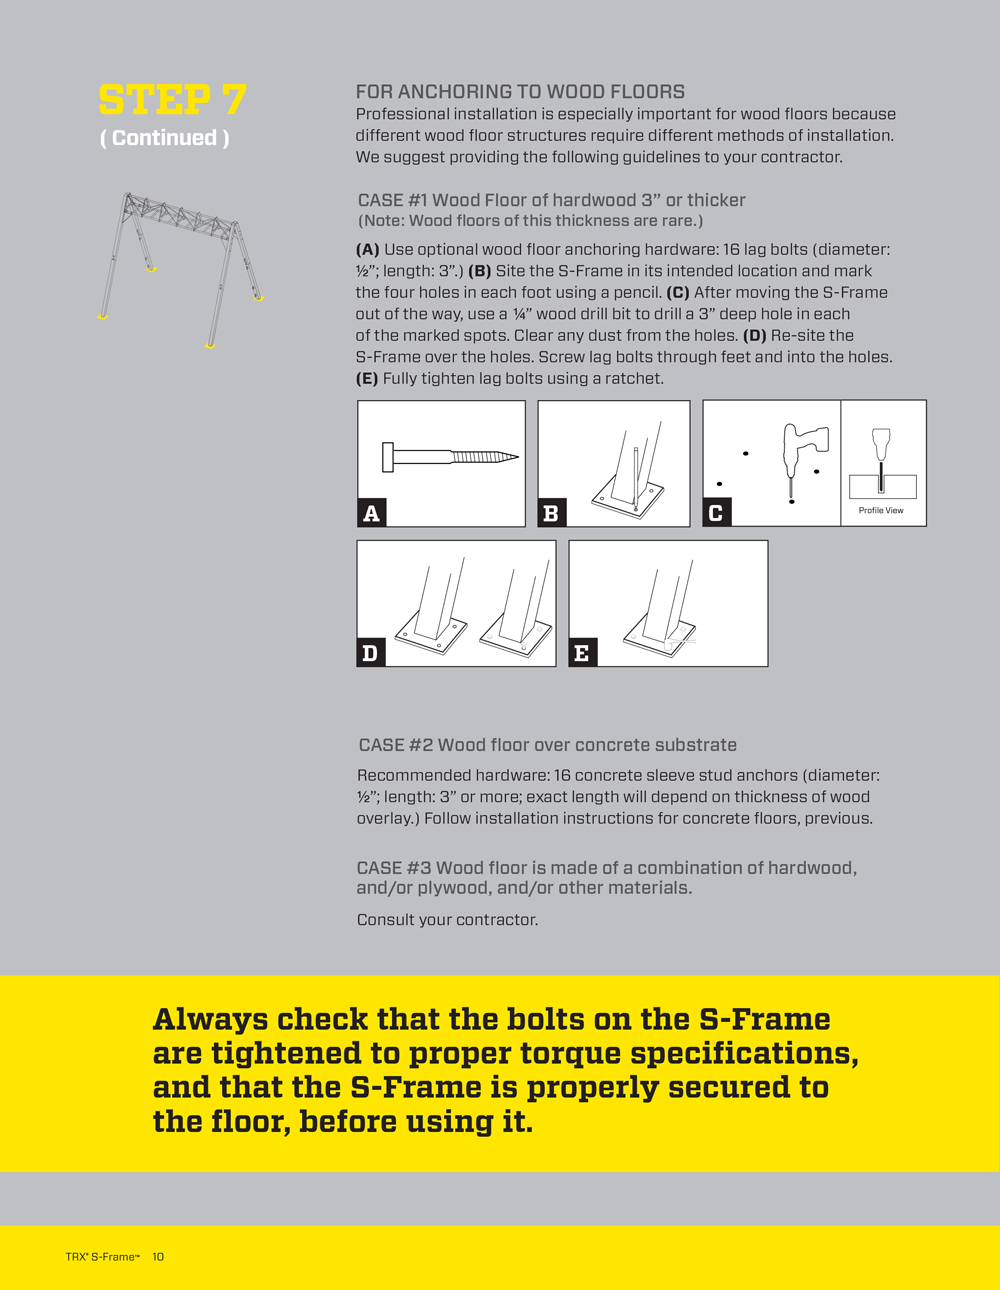
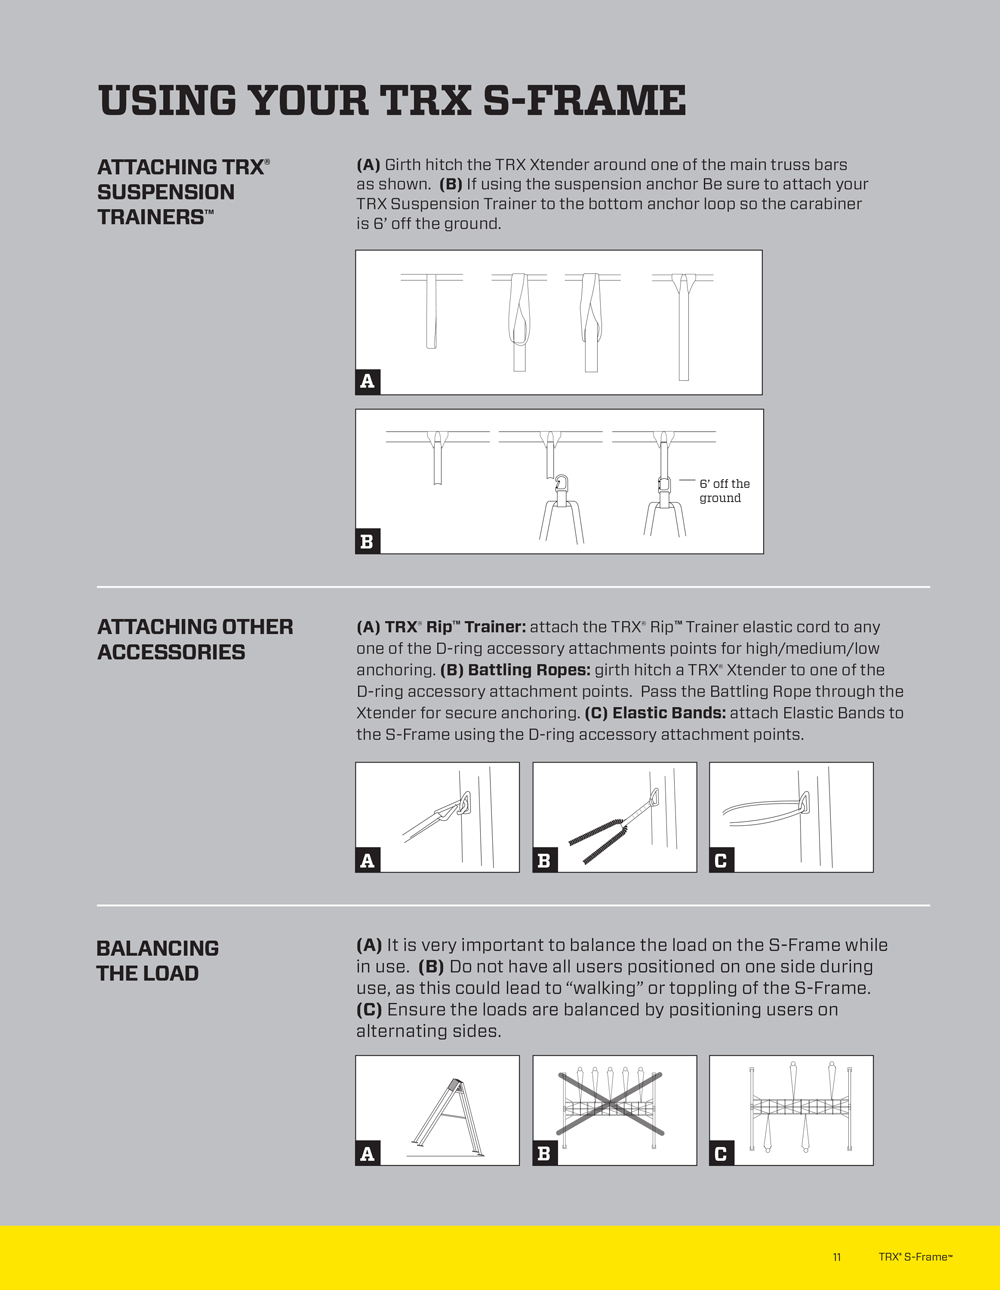
Using your TRX S Frame:
—
TRX Multi-Mount Is a heavy piece of equipment. It is intended to support significant weight during routine use and should be securely assembled and fastened to a supporting surface of suitable construction.
TRX Multi-Mount Components: Two of more people and the proper tools are required for assembly.
Starting Assembly:
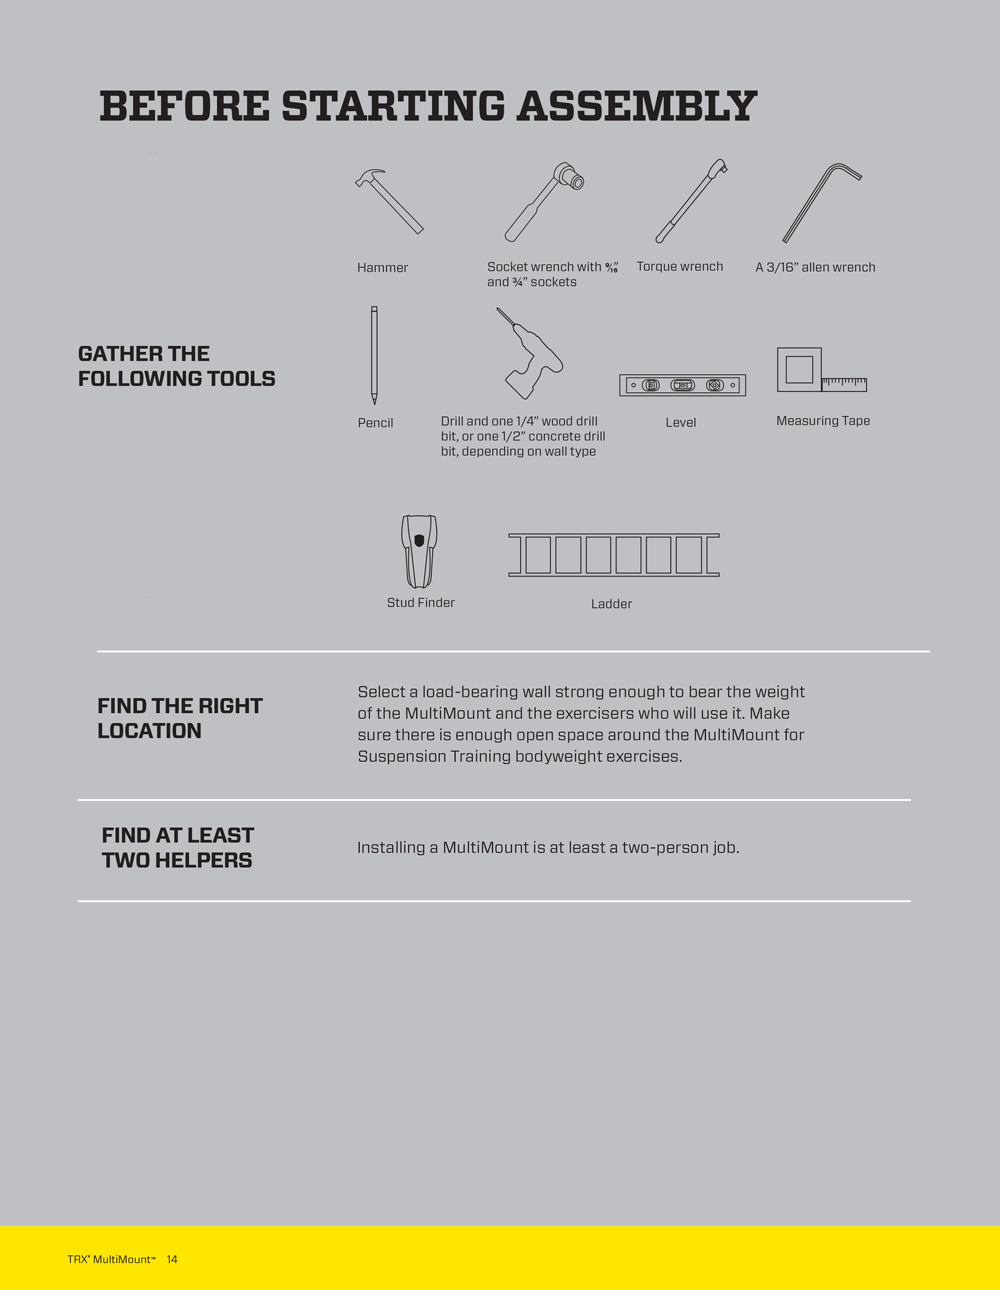
Gather the following tools – Find the right location – Find Helpers – Follow proper installation of bolt sets.
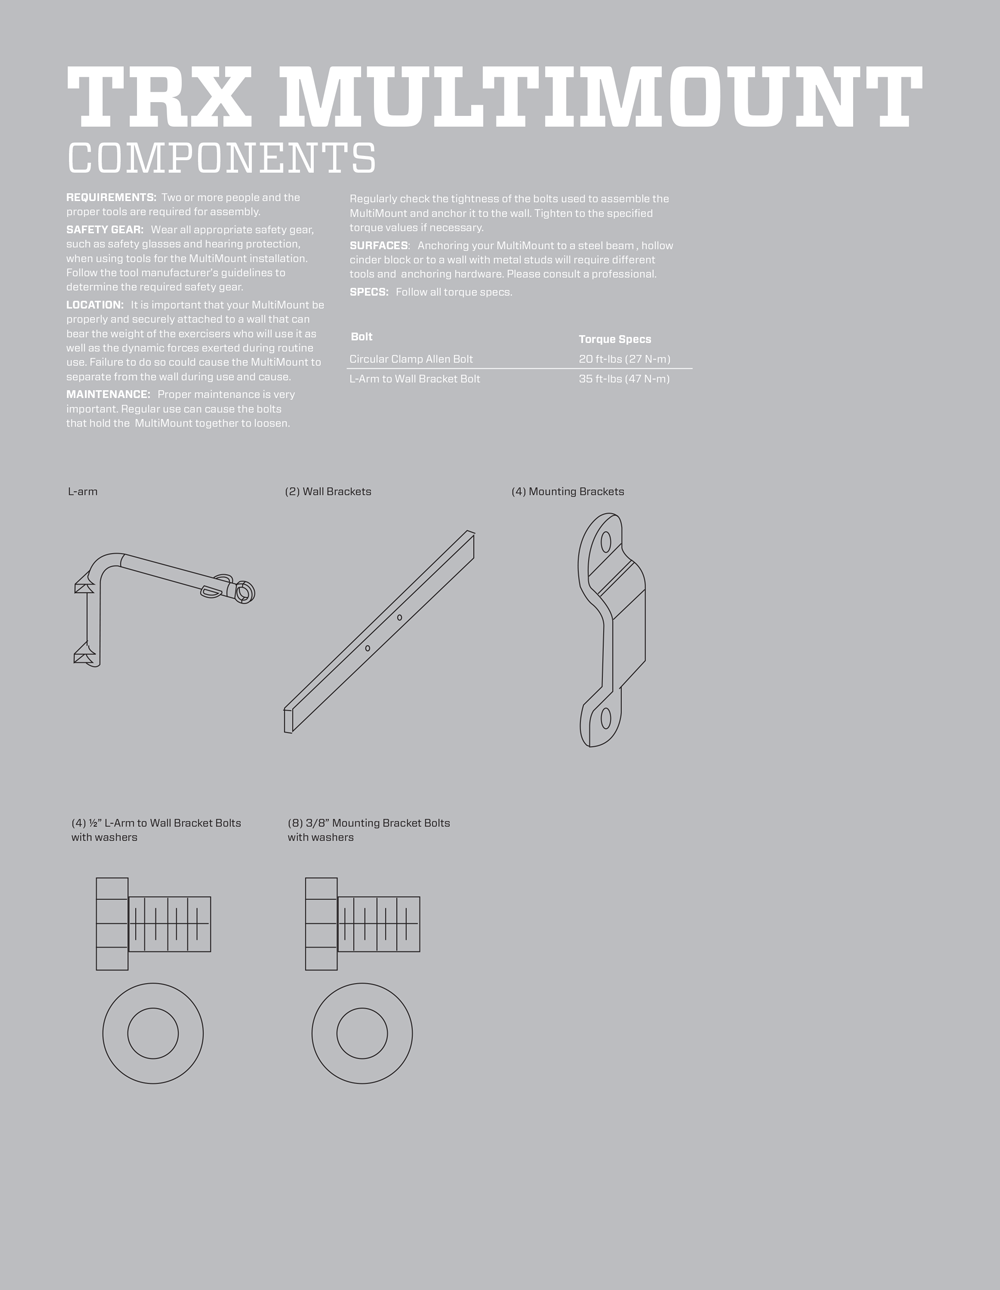
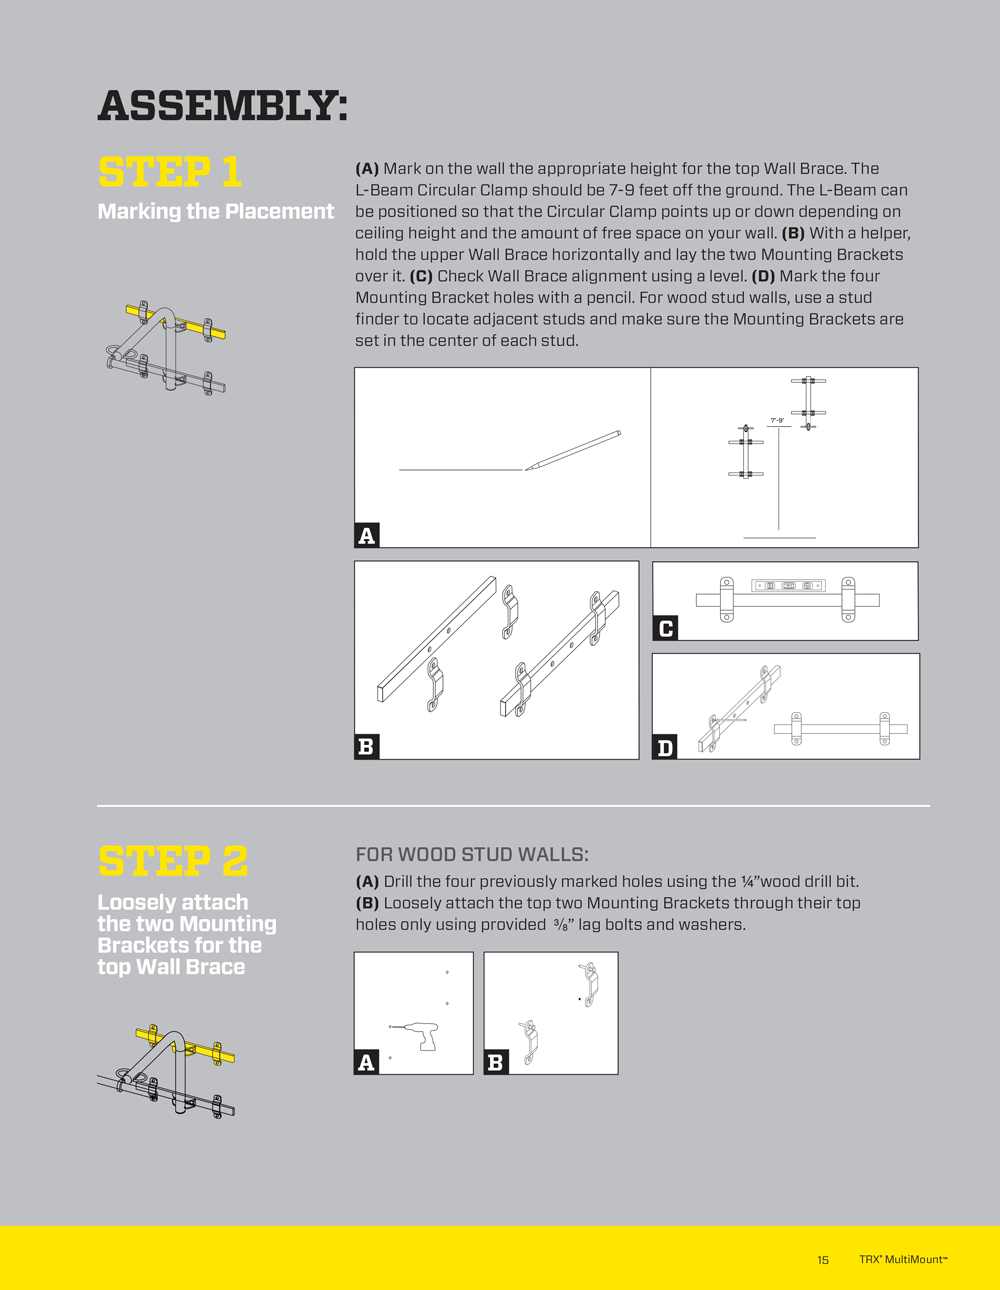
Step 1: Marking the Placement:
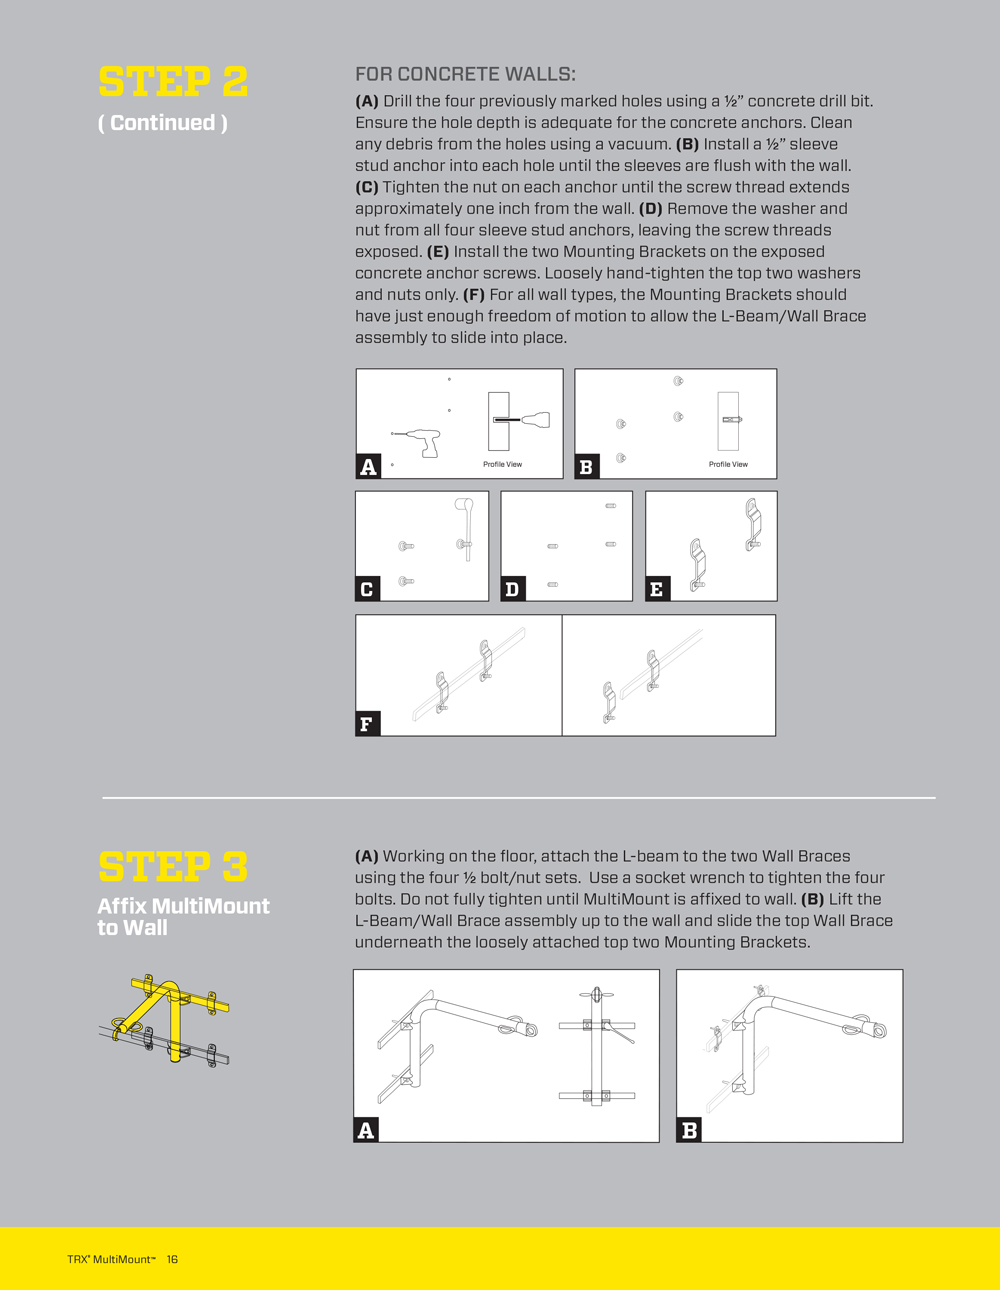
Step2: Loosely attach the two mounting brackets for the top wall brace:
Step 3: Affix Multi-Mount to Wall:
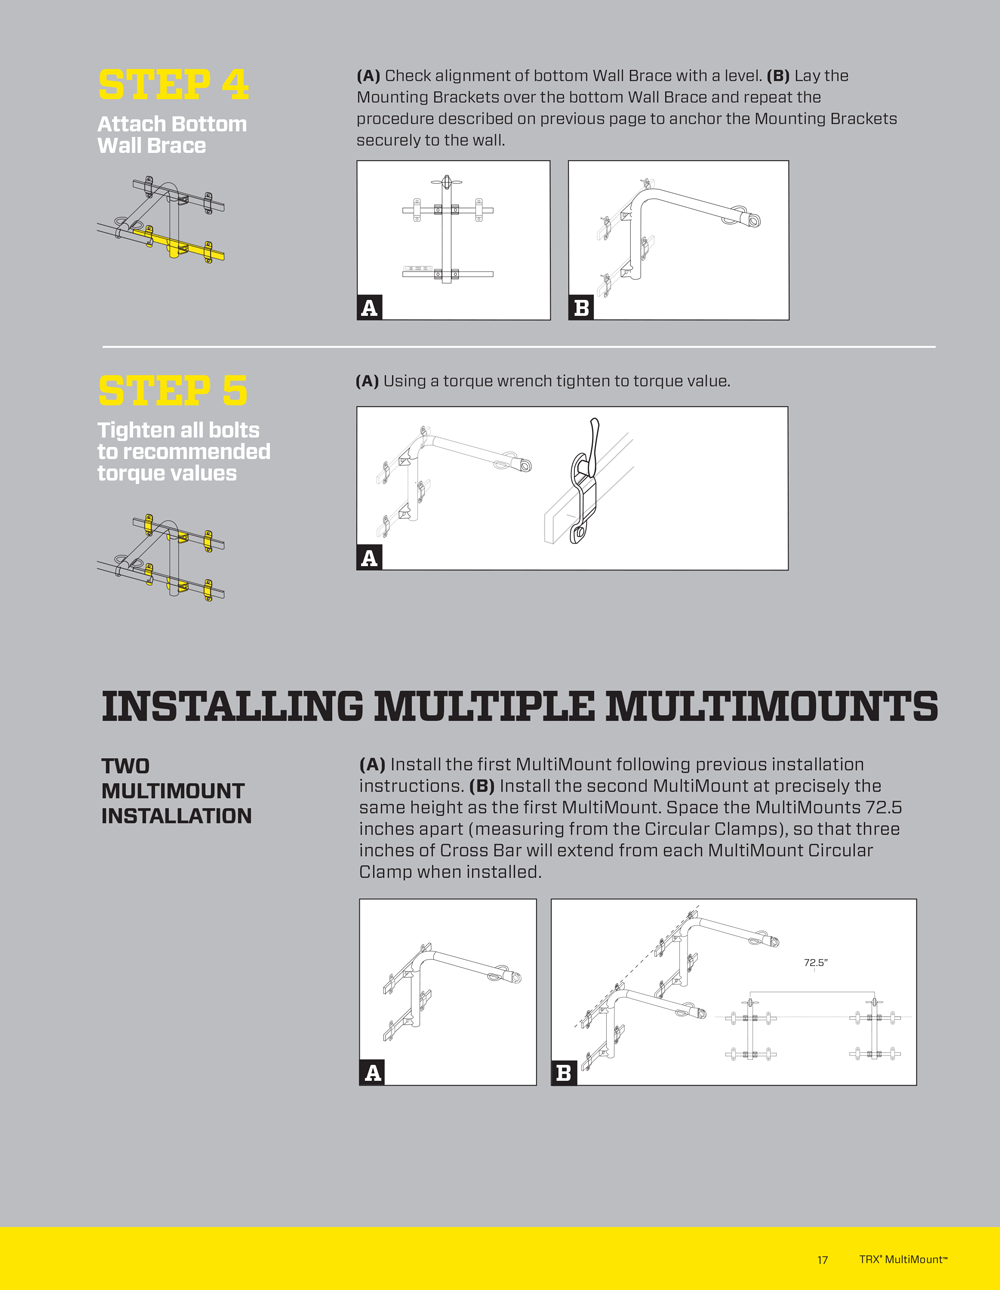
Step 4: Attach bottom wall brace:
Step 5: Tighten all bolts to recommended torque values:
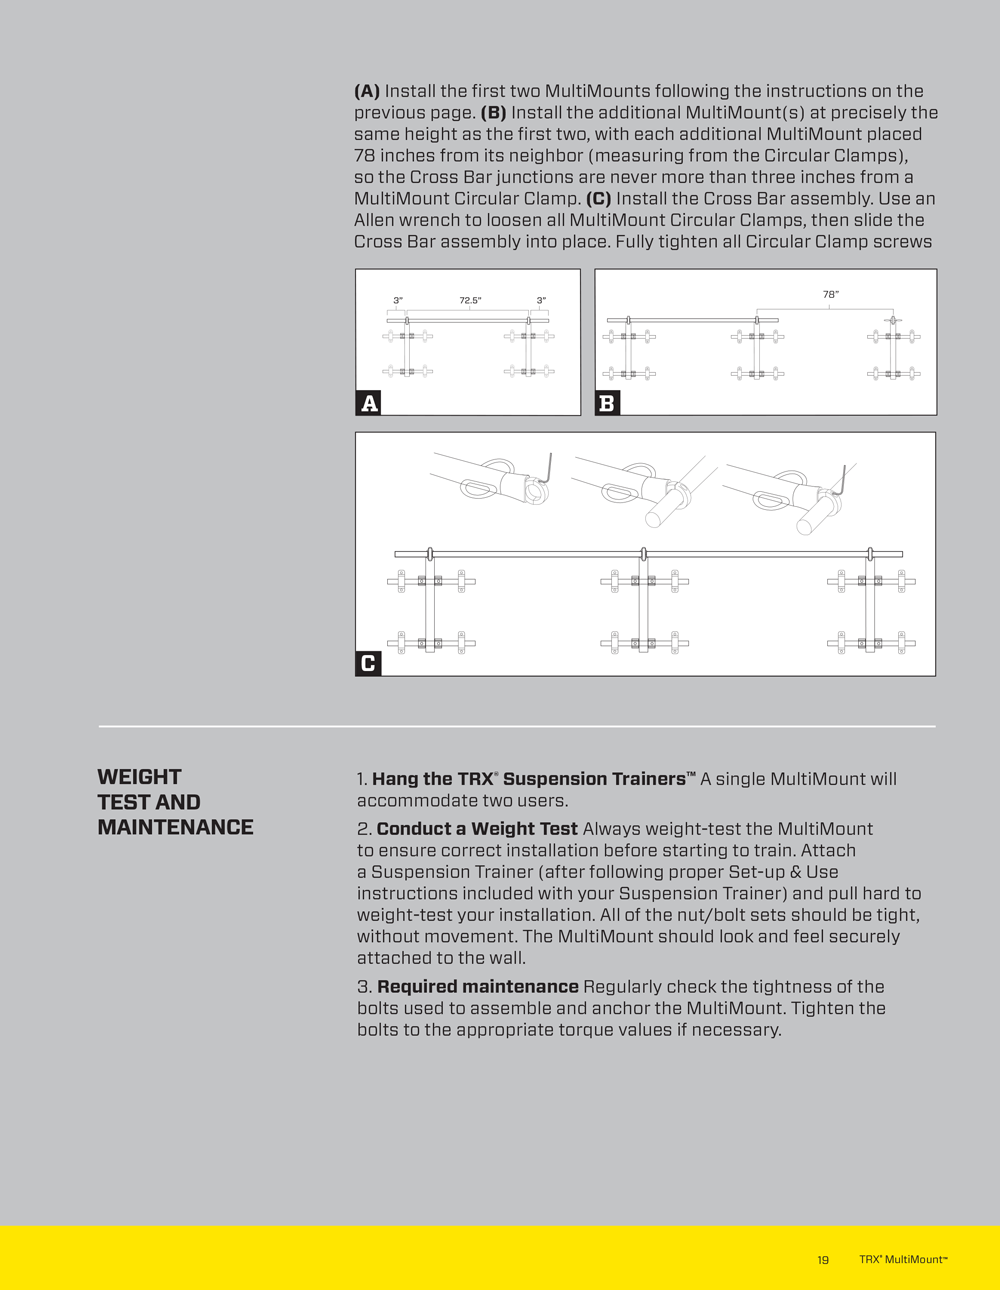
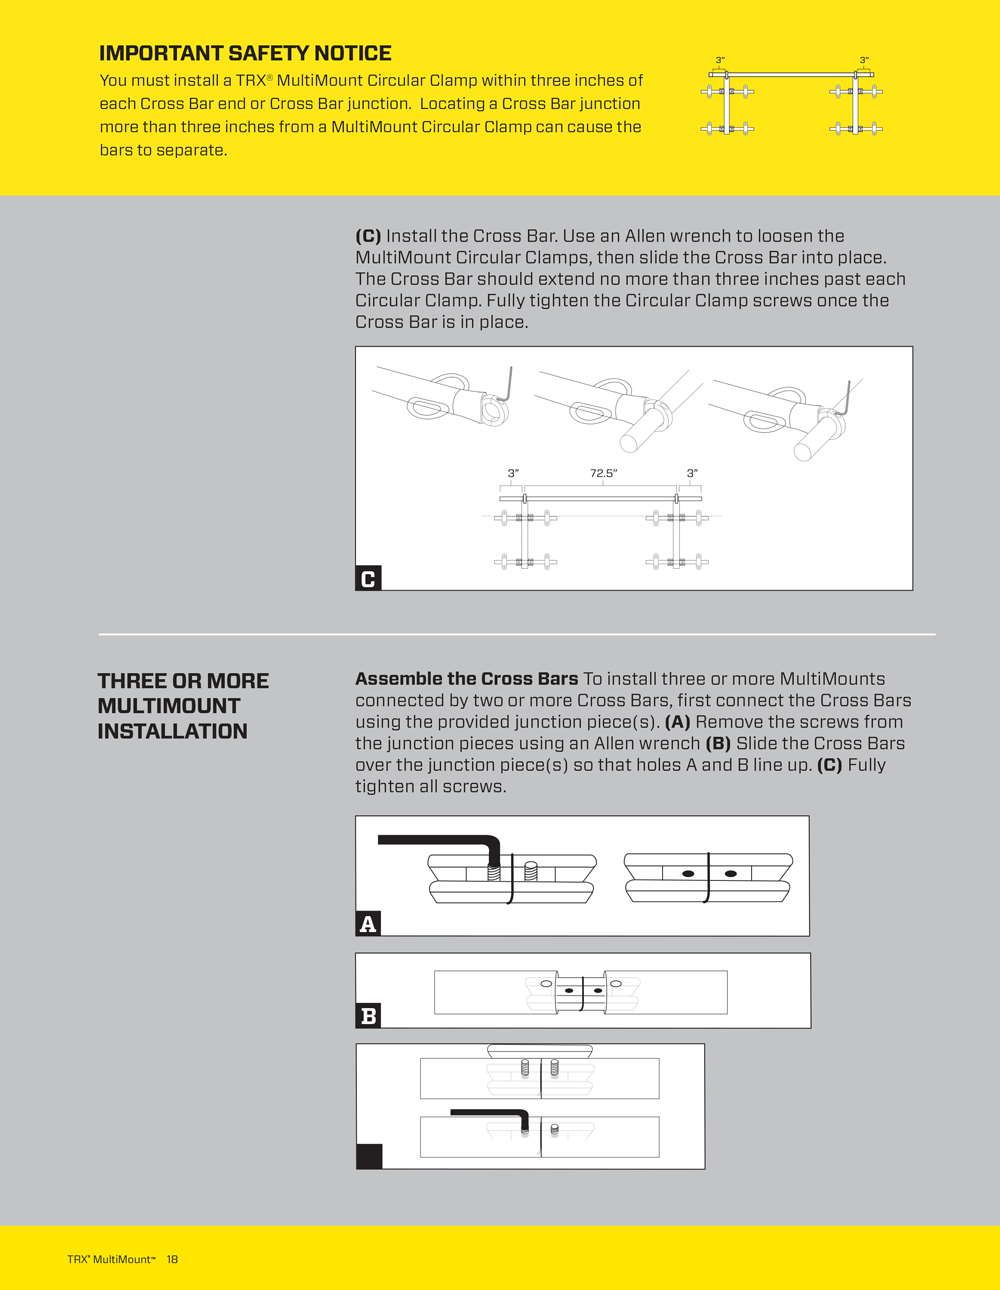
Installating Multiple Multi-Mounts
Weight Test and Maintenance
